Guide to the Login section Student and teacher functions
The following is a guide to the Login section of the website, beginning with an explanation of the teacher account: how to register/upgrade to a teacher account, how to create a class for students to join, how to edit a class, how to view student information, how to view information about quizzes, and how to import (register) students.
The second part explains features of a student account.
Teacher account How to upgrade, set up classes, and view student results
Upgrade to teacher account
In order to set up classes and view student results, you first need to upgrade your existing account to a teacher account (if you do not have an existing account, you can register for one). If you just want to try out the features of a teacher account, or only have a few students, you can upgrade to a free teacher account using licence key AAAA-AAAA-AAAA.

If you want more features, you can upgrade to a higher plan by purchasing a licence fee, and entering it on the upgrade page. Higher plans allow you to remove students (Basic plan and above), archive classes (Standard plan and above) and import students (Elite plan). The number of classes, and number of students per class, also increases with each plan.
Create a class
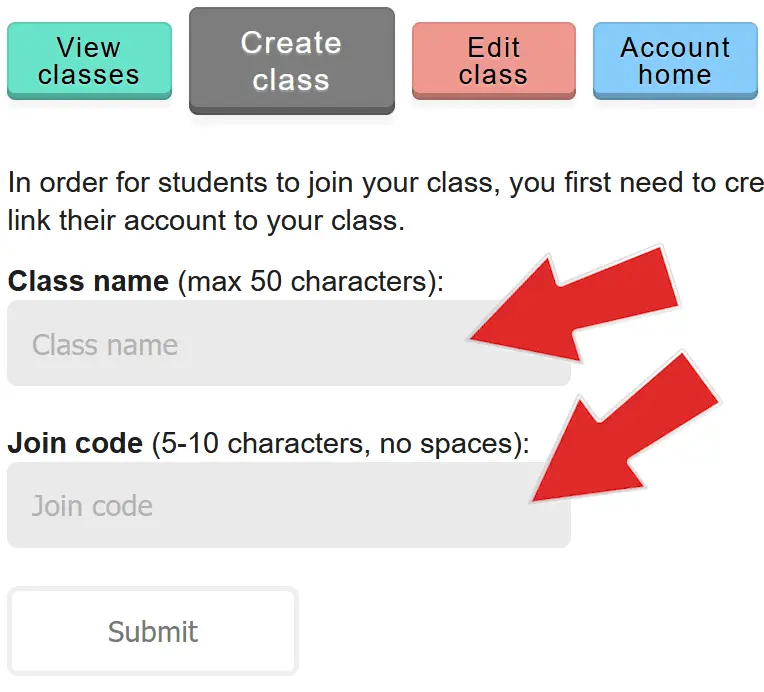
Once you have a teacher account set up, you will need to create a class for students to join. All you need is a class name and a join code. The class name has to be unique to your account, while the join code has to be one no other teacher has used, 5-10 characters in length.
Once you have a join code you can issue it to students, who will enter it on their account home page.
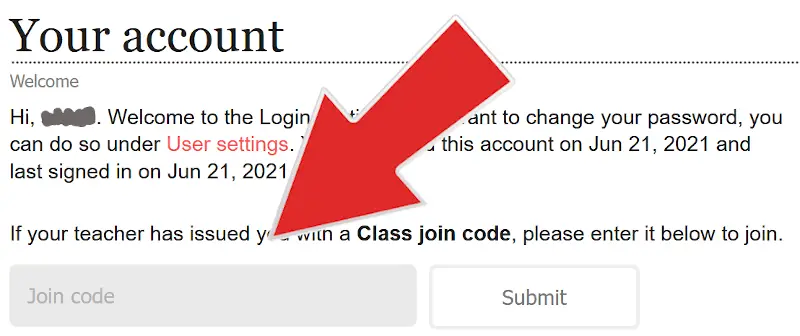
Edit a class
You can also edit a class if you want to change the class name or join code, close it (so that no more students can join) or archive it (so that you can create a new class and not lose the data from this one).
View student information
This is the most important part, and the reason why a teacher would want to create a class in the first place. There is a lot of information to be seen here, as shown in the following images.
General student information
When you first go to the View classes page you can see general student information for each of the classes. This includes username and email, along with when they joined the class, the number of quizzes they have taken (#Qz), how many total quiz attempts they have (Atts), the date of their first quiz, and the date of their last quiz.

Information by quiz
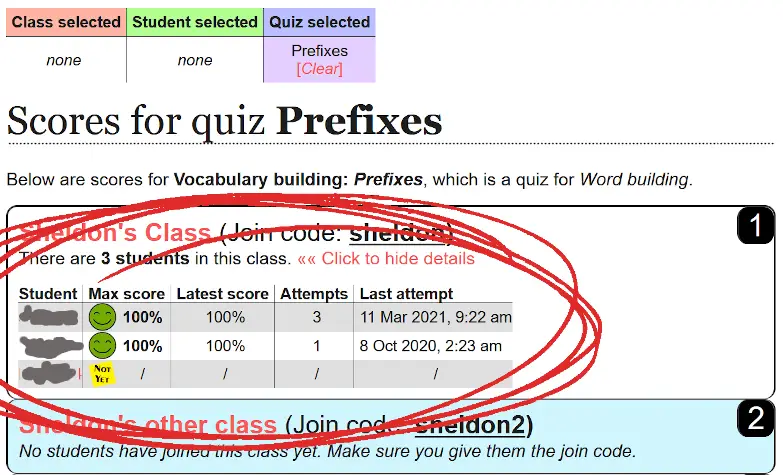
By clicking on the name of individual quizzes (see later), you can see whether students have completed these and, if so, when they completed them and how they scored. This is useful if you have a class of students all working on the same area of academic English at the same time. Quizzes can be set for homework, and scores checked later.
Information by student
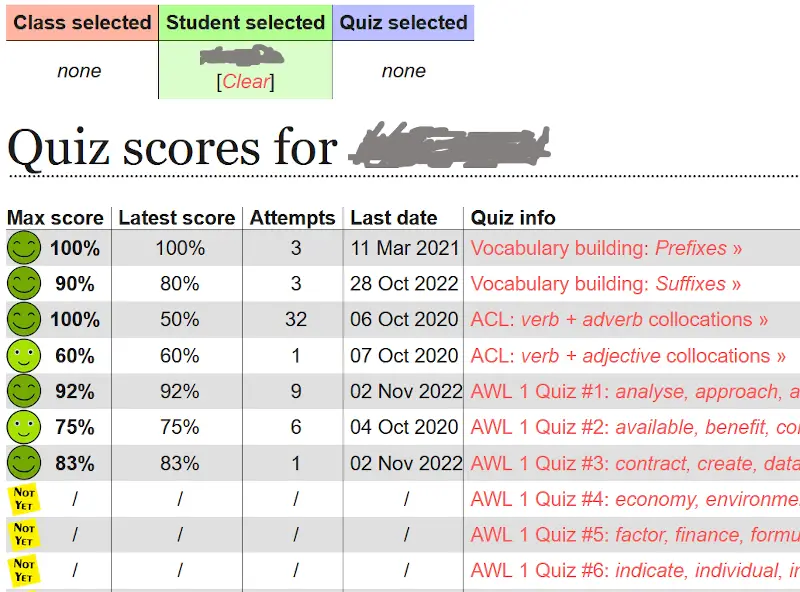
You can also view information by student. This allows you to see which quizzes an individual student has taken, when they took them, how many times, and how they performed.
View quiz summary
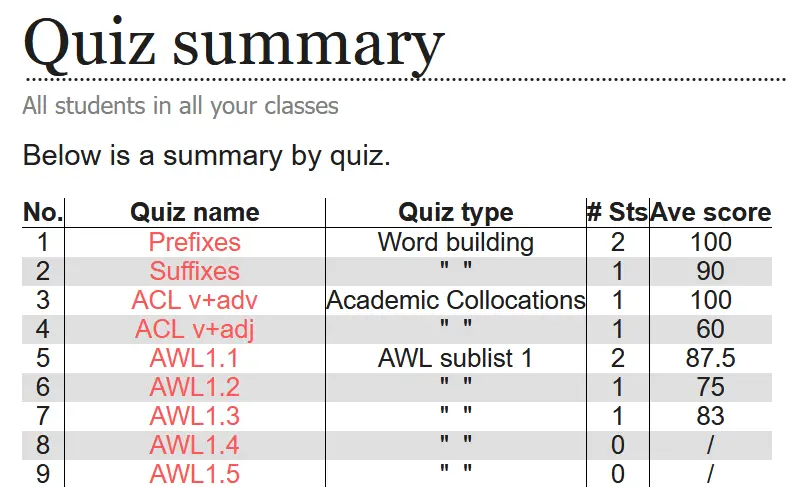
You can also check out all of the quizzes, see how many students have taken them, how they have performed, and the average score for each one. This can be done for all classes, or for individual classes. This might be helpful in understanding which aspects students are doing well in, and which ones they need to practise more.
Remove or readmit students
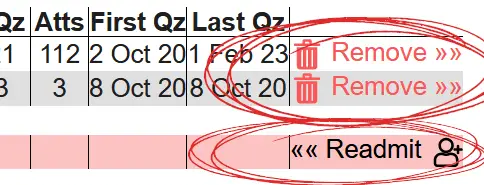
Other things you might want to do via the teacher account are remove students (if they joined the wrong class, or if you need space for other students), or readmit students who you have previously removed from a class.
Import (register) students
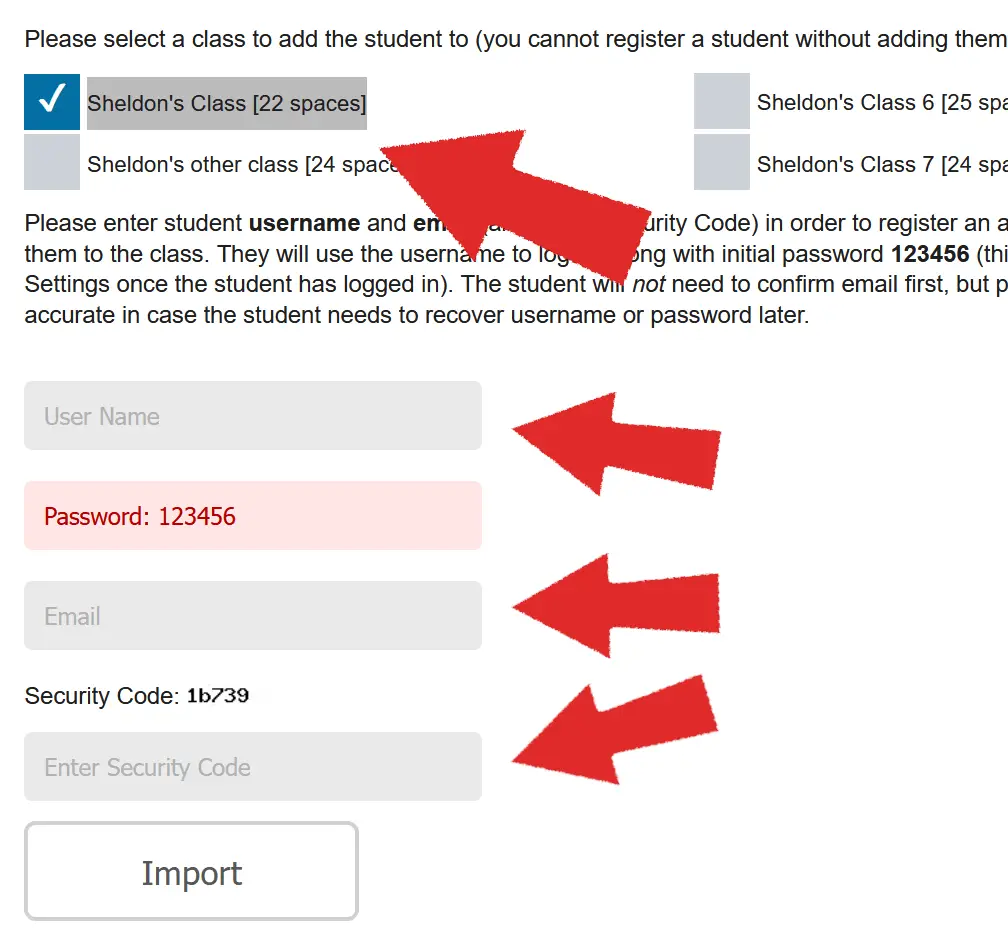
A final feature of the teacher account is the ability to import students. This means you will create an account for them by entering username and email.
This feature avoids the need for students to go through the full account registration and email verification process, which some students can struggle with. By importing them yourself, you can simply issue usernames and the default password (123456) and they can log in straight away.
Student account
In order to do exercises and quizzes on the site, you will need an account for the Login section. It is free and easy to use. The following explains how to register for an account and how to view quiz scores and take quizzes.
Register for an account
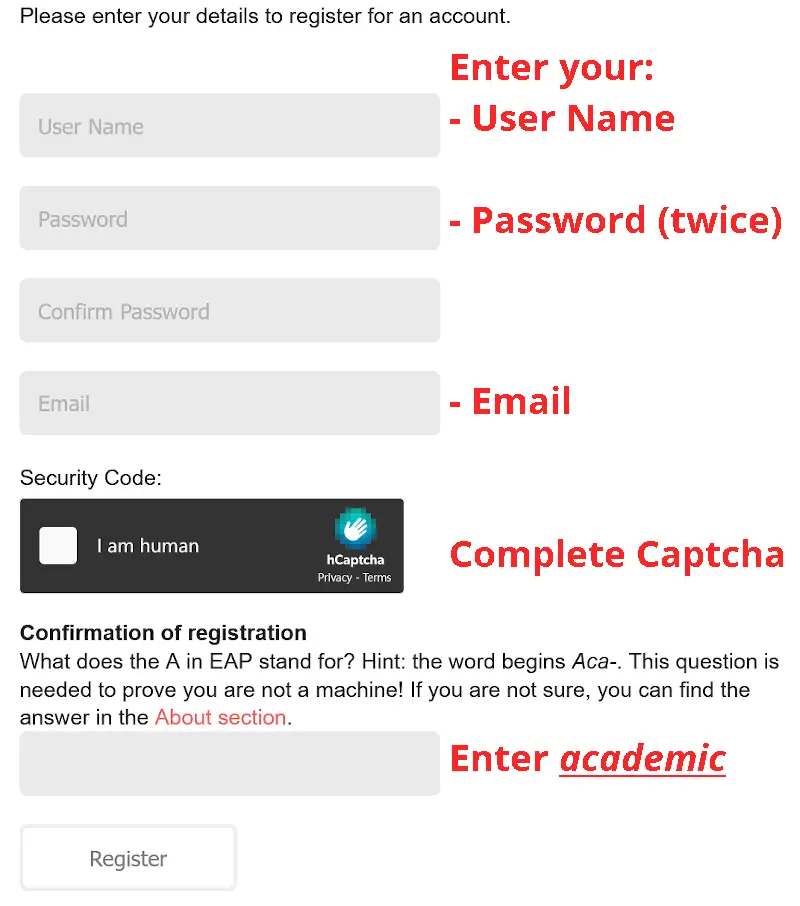
Before you can access quizzes, you need to register for an account. First, you need to agree to the terms and conditions. After that, you need to enter your details (User Name, Password, Email). You also need to complete a Captcha, and enter the word academic in the final box, to prove that you are human!
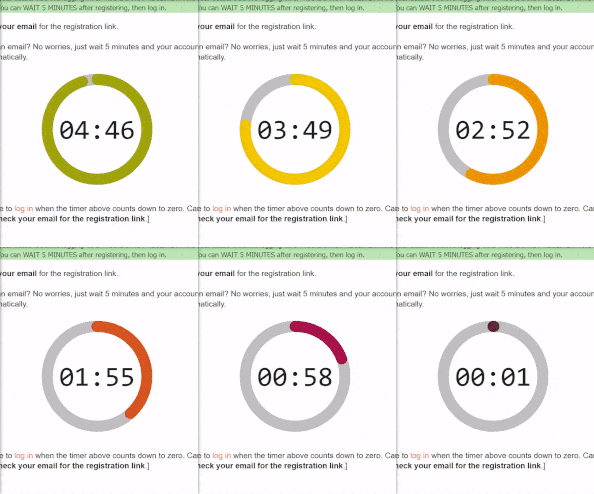
Check your email with a link to confirm. If you did not get an email, do not worry; just wait 5 minutes and your account will be activated automatically and you can log in without email confirmation.
View scores and take quizzes
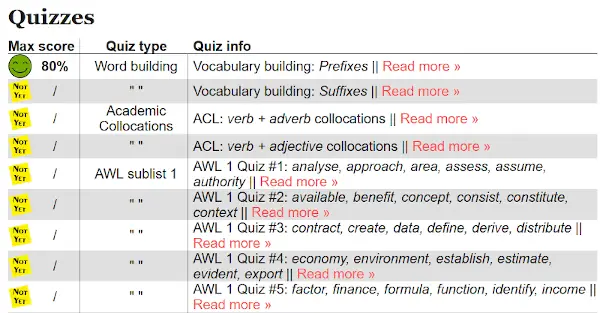
When you go to your account home page, you can see a summary of quizzes you have taken and scores for each one. Click on Read more » to go to the respective quiz page and take the quiz.
When you finish taking a quiz, remember to CLICK ON SAVE SCORE BUTTON in order to save the score. Otherwise there will be no record of the quiz.

